注意!!! ==注意!!!==
1、现在我已经将把 base64 转换成文件保存到指定位置的代码上传到了 maven 中央仓库,你们可以直接引入这个依赖使用
1 2 3 4 5 6 <dependency > <groupId > icu.xuyijie</groupId > <artifactId > Base64Utils</artifactId > <version > 1.3.3</version > </dependency >
1 2 3 4 5 6 7 8 9 10 11 12 13 String s = Base64Utils.transferToBase64("D:/下载/Screenshot_20221008-090627.png" , false );File file = new File (filePath);String s = Base64Utils.transferToBase64(file, false );System.out.println(s); String s1 = Base64Utils.generateFile(s, "D:\\下载\\aaa.png" );String s1 = Base64Utils.generateFile(s, "D:/下载" , "aaa.png" );System.out.println(s1); File file = Base64Utils.getFile("D:/下载/a.png" );FileInputStream fileInputStream = Base64Utils.getFileStream("D:/下载/a.png" );String fileType = Base64Utils.getFileType("传入base64Str" );
前言 整体思路:
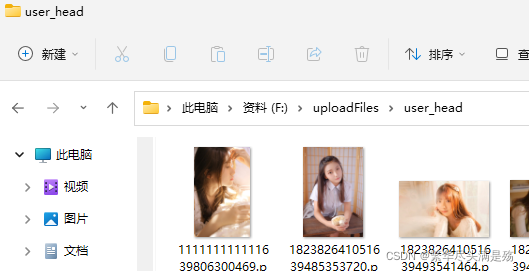
vant插件默认的图片从前端上传到后端,是以 base64 码的形式传输的,而 base64 码很长很长,有几千个字符,存入数据库会占用空间,每次读取都传输 base64 的话也很消耗带宽和流量,所以后端接收以后要转化 base64 为图片存到硬盘或服务器,而数据库只保存图片的物理地址的路径,例如 F:/img/aa.png
一、Vue 前端 我用的时 vant 的上传框架,你们用js什么的把图片转化为 base64 码。
1 2 3 4 5 6 7 8 9 10 11 12 13 14 15 16 17 18 <van-uploader :after-read ="uploadImg" preview-size ="50px" v-model ="userHead" :max-count ="1" /> <script > methods :{ submit ( this .$axios .post ("/user/userInfo" , { userHead : this .file , username : this .username , }) .then (successResponse => console .log (successResponse) }) } } </script >
二、Springboot 后端
这里是一些简单的源码示例
1、引入Base64依赖 1 2 3 4 5 6 <dependency > <groupId > commons-codec</groupId > <artifactId > commons-codec</artifactId > <version > 1.10</version > </dependency >
2、在项目里新建 utils 包,新建一个Base64Util类 1 2 3 4 5 6 7 8 9 10 11 12 13 14 15 16 17 18 19 20 21 22 23 24 25 26 27 28 import org.apache.commons.codec.binary.Base64;import java.io.*;public class Base64Util { public static void GenerateImage (String base64Str, String imgFilePath) { if (base64Str == null ) return ; try { byte [] bytes = Base64.decodeBase64(base64Str); for (int i = 0 ; i < bytes.length; ++i) { if (bytes[i] < 0 ) { bytes[i] += 256 ; } } OutputStream out = new FileOutputStream (imgFilePath); out.write(bytes); out.flush(); out.close(); } catch (Exception e) { } } }
下面模拟一个保存用户头像信息的方法
==String base64 = StringUtils.substringAfter(userInfo.getUserHead(), “;base64,”);== 这句是把 base64 码的前缀去掉,base64转换为图片是不需要这个前缀的,不去掉会影响转换,当然,如果你使用了我一里面封装的依赖,就不需要这一行自己去除了,代码会自动判断是否去除。
==path== 里面就写你要保存图片的位置,和文件名,文件名是以用户手机号+当前时间毫秒数命名的,记得写文件类型,我这里是png,当然,如果你使用了我一里面封装的依赖,就不需要写后缀了,会自动判断文件类型。
==Base64Util.GenerateImage(base64, path);== 是用我们的工具把前端传来的 base64 解析成图片保存在path定义的路径下
==File file = new File(path);
1 2 3 4 5 6 7 8 9 10 11 12 @Override public String userInfo (UserInfo userInfo) { String base64 = StringUtils.substringAfter(userInfo.getUserHead(), ";base64," ); String path = "F:\\" + user.getMobilePhone() + System.currentTimeMillis() + ".png" ; Base64Util.GenerateImage(base64, path); File file = new File (path); userInfo1.setUserHead(file.getPath()); userMapper.updateById(user); return "保存成功" ; }
总结
读取的话就不写了,看我的另一篇,另一篇怎么从服务器读取也有教
传送门:Springboot物理地址映射+Nginx静态资源代理实现前端上传并访问服务器图片


